Splunk Threat Intel IOC Integration via Lookups

Splunk Threat Intel IOC Integration via Lookups

Today most security teams have access to a lot of different information sources. On the one hand they collect log data from different sources and try to correlate them in a useful way in so-called SIEM systems. On the other hand they receive threat information from different sources like APT reports, public or private feeds or derive those indicators from their own investigations and during incident response.
Therefore one of the main tasks of security monitoring today is to combine these different data sources, which means to apply the threat intel information to the data that is already available in SIEM systems or scan for it on-demand using tools like my free IOC scanner LOKI or our APT Scanner THOR.
In this article I would like to describe a method to apply threat intel information to log data in Splunk using simple lookup definitions.
I recently integrated two different threat intel receivers in my free IOC scanner LOKI. One of them fetches all IOC (indicator of compromise) elements from AlienVault’s Open Threat Exchange platform OTX and saves them to a subfolder in the LOKI program folder in order to be initialized during startup.
This weekend I added a new option called “–siem” that instructs the receiver to generate a CSV file with header line and the correct format for a lookup definition in Splunk.

Example - Threat Intel Feed OTX Receiver (LOKI)

Example – Threat Intel Feed OTX Receiver (LOKI)

The resulting file for the hash IOCs looks like this:

Threat Intel CSV for Splunk Lookup

Threat Intel Hash CSV for Splunk Lookup

Using the “-o” parameter you are able to select an output folder. I chose the folder for the lookup definitions in the search app, which is “$SPLUNK_HOME/etc/apps/search/lookups”.

Threat Intel SIEM Integration CSV Lookup

Threat Intel CSV Files in Splunk Search App Lookup Folder

After saving the output files to this directory we can select the CSV file in the lookup definition settings dialog (Settings > Lookups > Lookup definitions > Add new). I named the lookup “otxhash”.

Splunk Threat Intel Integration Lookup Definition

Threat Intel CSV File Lookup Definition in Splunk

Now we can apply this lookup to all log data that contains file hash information like Antivirus logs, THOR and LOKI scan results or in this case the logs of Microsoft Sysmon.

Windows Sysmon Log Data in Splunk

Windows Sysmon Log Data in Splunk

Using the free Add-on for Microsoft Sysmon all the log fields will be extracted automatically. You will see a field named “Hash” that can be used in our search definitions to allow a direct lookup.

Windows Sysmon Log Data in Splunk

Windows Sysmon Log Data with Hash Values of Executables

The lookup compares the “Hash” field from the Sysmon event message with the “hash” field from the OTX threat intel CSV file and sets a new “threat_description” field with the value of the “description” field from the CSV.

index=windows_sysmon
| lookup otxhash hash AS Hash OUTPUT description AS threat_description
| search threat_description=*
| table UtcTime,ComputerName,User,Hash,ProcessId,CommandLine,threat_description

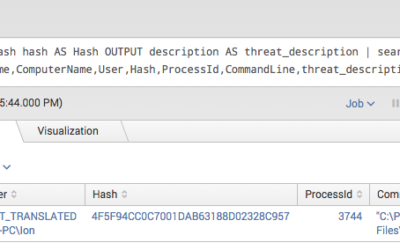
After the lookup I search for all entries that have a “threat_description” field set and display them in a easy-to-read table view. Only entries that had a “Hash” matching on a “hash” from the CSV will have this new field set. In the example below I had a match on an unwanted application called “Pantsoff” that I used in my Lab environment for this POC.

Threat Intel CSV Lookup in Splunk

Threat Intel Lookup in Splunk

I would define this search as an “Alert” that runs every 15 minutes and searches in log data of the last 15 minutes in order to get immediately informed if a blacklisted executable had been used. (avoid realtime searches/alerts in Splunk)
Furthermore the threat intel receiver should be scheduled via cron in order to run hourly/daily.
The two other files create by the threat intel receiver contain information on filenames and C2 server (hostnames, IPs) that can be applied in a similar way. The only small downer is that Lookups can only be used for “equal” matches and don’t allow to search for elements that “contain” certain fields of the CSV file. This is no problem in case of the C2 server definitions but for the filename definitions, which can be e.g. “AppData\\evil.exe”.
I’ll improve the Threat Intel Receivers in the coming weeks and add the “–siem” option to the MISP Receiver as well.
I hope you enjoyed the article and found it inspiring even if you don’t use Splunk or the other mentioned tools.
Besides: I am working on a RESTful web service with the working title “TRON” that allows to query for threat intel indicators and supports different comparison modes including including the missing “contains” supporting OpenIOC and STIX as input files. It is not ready yet but I’ll inform you as soon as there is something to show.
Follow me on Twitter via @Cyb3rOps

Detect System File Manipulations with SysInternals Sysmon

SysInternals Sysmon is a powerful tool especially when it comes to anomaly detection. I recently developed a method to detect system file manipulations, which I would like to share with you.
We know how to track processes with the standard Windows audit policy option “Audit process tracking”, but Sysmon messages contain much more information to evaluate. By using Sysmon on many systems within the network and collecting all the logs in a central location you’ll get a database full of interesting attributes and Metadata which can be statistically analyzed in order to identify anomalies.
Carlos Perez wrote a really good article on Sysmon, which you should check out if you’re new to Sysmon and its capabilities.

Anomaly Detection

In recent years “anomaly detection” has often been used as marketing buzzword and as a result lost some of its shine. I am still a strong believer and often phrase sentences like “anomaly detection is the only method to detect yet unknown threats”. In security monitoring we call it anomaly detection, Antivirus vendors call it heuristics and SPAM appliances evaluate it in a “X-Spam-Score”.

Anomaly detection requires the ability to describe what is normal and exclude it from the evaluation.

With the data collected from the different Sysmon sources, this is an easy task to do. Sysmon provides the executable hash as MD5, SHA1 or SHA256 in the log entries that enables an analyst to identify the few different versions of a certain system executable. A hash of a system program like “cmd.exe” executed on the different systems on your domain should always be the same on all systems running the same version of Windows. But let me give you some examples.
A sane system environment analysis for the “cmd.exe” would look like this:

Hash - Image - Count
3C77C39347A6FA560A74587B0498FE84 - C:\WINDOWS\system32\cmd.exe - 56
AD7B9C14083B52BC532FBA5948342B98 - C:\Windows\System32\cmd.exe - 34

The following analysis includes an anomaly, which is worth to be investigated:

Hash - Image - Count
3C77C39347A6FA560A74587B0498FE84 - C:\WINDOWS\system32\cmd.exe - 56
AD7B9C14083B52BC532FBA5948342B98 - C:\Windows\System32\cmd.exe - 34
D8B7B276710127D233ABCDB7313AAC36 - C:\WINDOWS\system32\cmd.exe - 1

Let’s take a look at two analysis examples in which I use this method to identify different anomalies.

Anomaly 1: “StickyKeys” backdoor and the like

I use my favorite log analysis system for the analysis, which is Splunk. Getting the Sysmon data into splunk is easy as there is already a Sysmon Add-on available in the App Store. Just use the deployment manager to push the Add-on to the Splunk Forwarders and install Sysmon. (see my other blog post on Sysmon for more appropriate configuration options)
Then you can do things like that:

source="WinEventLog:Microsoft-Windows-Sysmon/Operational" NOT Image=*Sysmon.exe | dedup host,Image | stats distinct_count(Image) AS different_names,values(Image),values(host) by Hash | sort -different_names

It gives you an overview of files with the same hash but different names. It is pretty easy to spot the manipulation.

StickyKey Backdoor Detection with Splunk

StickyKey Backdoor Detection with Splunk and Sysmon

We detected a so called “StickyKeys” backdoor, which is a system’s own “cmd.exe” copied over the “sethc.exe”, which is located in the same folder and provides the Sticky Keys functionality right in the login screen. Replacing it with a system command line establishes a shell running as LOCAL_SYSTEM that pops up when you RDP to a server and press 5 times shift consecutively. (see this blog post for more information on this backdoor)

Anomaly 2: The Black Sheep

If you create the statistics by “Image” instead of “Hash” you’ll get an overview of the different versions of system files in use and are able to identify system file versions that are unique.
Look at the following example to get an impression what can be done with this method.

source="WinEventLog:Microsoft-Windows-Sysmon/Operational" NOT Image=*Sysmon.exe | dedup host,Image | rex field=Image "(?[^\\\]+)$" | eval Executable=lower(Executable) | stats count by Executable,Hash | sort +count

I am sorry but I can’t give you a nice screenshot on what would it look like in a big environment. These are the results from 3 different demo systems only (Win2003, Win7 and Win8), but in order to see what it would look like in a environment with hundreds or thousands of systems, see the listing below.

Sysmon Detection Splunk

Sysmon Anomaly Detection with Splunk

The result would look like this:

Hash - Image - Count
AD7B9C14083B52BC532FBA5948342B98 - cmd.exe - 1480
3C77C39347A6FA560A74587B0498FE84 - cmd.exe - 256
D8B7B276710127D233ABCDB7313AAC36 - cmd.exe - 2

Consider the image files with a low count as anomalies and try to figure out, why the hash of the system executable is different from the variants on the other systems.
I would google the hash of the black sheep, which is “D8B7B276710127D233ABCDB7313AAC36” and see if I can get more details. An empty google result is NOT a good sign as some may be inclined to believe. If the google results are ambiguous you should try to figure out if these systems are somehow special – e.g. certain readout system on embedded OS versions, systems that do not receive patches. If the findings are still suspicious you should drop the samples in a sandbox and see how they behave.
Hope you liked it. Please give me feedback if you actually tested this method in your environment so that I can improve the search statements or handle false positive conditions.

GDPR Cookie Consent with Real Cookie Banner