Today most security teams have access to a lot of different information sources. On the one hand they collect log data from different sources and try to correlate them in a useful way in so-called SIEM systems. On the other hand they receive threat information from...
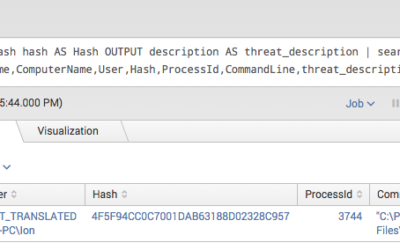
Splunk Threat Intel IOC Integration via Lookups
read more